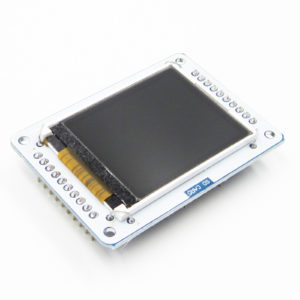
Arduino Uno 3.5 TFT LCD 480×320 Touch Display Shield er et meget flot display, med gode farver, og nem at arbejde med. Displayet er beregnet til en Arduino Uno R3, og kan monteres direkte oven på.
Tekniske detaljer:
Display ColorRGB 65K color
Screen Size: 3.5(inch)
Type: TFT
Driver IC: R61581
Resolution: 480*320 (Pixel)
Module Interface: 8-bit parallel interface
Active Area: 73.44*48.96(mm)
Module PCB Size: 85.49*55.63(mm)
Operating Temperature: -20℃~70℃
Storage Temperature: -40℃~70℃
Operating Voltage: 5V/3.3V
Power Consumption: TBD
Applicable for Arduino Uno & MEGA 2560 development board, compatible with UTFT / UTFT_Buttons / Utouch Library for Arduino Mega2560.
This LCD display module is based on R61581 controller, high quality for a long time use.
Installere Arduino IDE Software
Før du kan starte din programmering skal Arduino’s IDE software hentes. Dette program bruges til at programmere chippen.
Download fra dette link: Downlaod
Installere Adafruit-GFX-Library-master
- Download library (Download)
- Udpak filer
- Flyt/kopir mappen “Adafruit-GFX-Library-master” til “libraries” som findes i “Arduino IDE” mappen (C:Program Files (x86)Arduinolibraries)
- Åben Arduino IDE software og klik på “Sketch/Include library”
- Klik nu på “Add Zip. library” og find Zip filen du lige har downloaded.
- Åben “Manage” for at opdatere library.
- Luk, og åben Arduino IDE programmet. (Genstart programmet)
- Nu er Adafruit-GFX-Library-master Library installeret
Installere MCUFRIEND
- Download library (Download)
- Udpak filer
- Flyt/kopir mappen “Adafruit-GFX-Library-master” til “libraries” som findes i “Arduino IDE” mappen (C:Program Files (x86)Arduinolibraries)
- Åben Arduino IDE software og klik på “Sketch/Include library”
- Klik nu på “Add Zip. library” og find Zip filen du lige har downloaded.
- Åben “Manage” for at opdatere library.
- Luk, og åben Arduino IDE programmet. (Genstart programmet)
- Nu er MCUFRIEND Library installeret
Programmering
Inden programmeringen kan udføres skal den rigtige “COM” port findes. Klik “Værktøj/Port” – og vælg COM port.
Eksempel
Her vises er eksempel på hvordan du men en “Button” kan lave en funktion til On/Off”.
Du skal bruge:
Kode:
#if 1

#include <Adafruit_GFX.h>
#include <MCUFRIEND_kbv.h>
MCUFRIEND_kbv tft;
#include <TouchScreen.h>
#define MINPRESSURE 200
#define MAXPRESSURE 1000

// ALL Touch panels and wiring is DIFFERENT
// copy-paste results from TouchScreen_Calibr_native.ino
const int XP = 6, XM = A2, YP = A1, YM = 7; //ID=0x9341
const int TS_LEFT = 907, TS_RT = 136, TS_TOP = 942, TS_BOT = 139;

TouchScreen ts = TouchScreen(XP, YP, XM, YM, 300);

Adafruit_GFX_Button on_btn, off_btn;

int pixel_x, pixel_y; //Touch_getXY() updates global vars
bool Touch_getXY(void)
{
TSPoint p = ts.getPoint();
pinMode(YP, OUTPUT); //restore shared pins
pinMode(XM, OUTPUT);
digitalWrite(YP, HIGH); //because TFT control pins
digitalWrite(XM, HIGH);
bool pressed = (p.z > MINPRESSURE && p.z < MAXPRESSURE);
if (pressed) {
pixel_x = map(p.x, TS_LEFT, TS_RT, 0, tft.width()); //.kbv makes sense to me
pixel_y = map(p.y, TS_TOP, TS_BOT, 0, tft.height());
}
return pressed;
}

#define BLACK 0x0000
#define BLUE 0x001F
#define RED 0xF800
#define GREEN 0x07E0
#define CYAN 0x07FF
#define MAGENTA 0xF81F
#define YELLOW 0xFFE0
#define WHITE 0xFFFF

void setup(void)
{
Serial.begin(9600);
uint16_t ID = tft.readID();
Serial.print("TFT ID = 0x");
Serial.println(ID, HEX);
Serial.println("Calibrate for your Touch Panel");
if (ID == 0xD3D3) ID = 0x9486; // write-only shield
tft.begin(ID);
tft.setRotation(0); //PORTRAIT
tft.fillScreen(BLACK);
on_btn.initButton(&tft, 60, 200, 100, 40, WHITE, CYAN, BLACK, "ON", 2);
off_btn.initButton(&tft, 180, 200, 100, 40, WHITE, CYAN, BLACK, "OFF", 2);
on_btn.drawButton(false);
off_btn.drawButton(false);
tft.fillRect(40, 80, 160, 80, RED);
}

/* two buttons are quite simple
*/
void loop(void)
{
bool down = Touch_getXY();
on_btn.press(down && on_btn.contains(pixel_x, pixel_y));
off_btn.press(down && off_btn.contains(pixel_x, pixel_y));
if (on_btn.justReleased())
on_btn.drawButton();
if (off_btn.justReleased())
off_btn.drawButton();
if (on_btn.justPressed()) {
on_btn.drawButton(true);
tft.fillRect(40, 80, 160, 80, GREEN);
}
if (off_btn.justPressed()) {
off_btn.drawButton(true);
tft.fillRect(40, 80, 160, 80, RED);
}
}
#endif
SD Kort
Vil du tilføje et SD kort så kik HER
Kontakt os
Du er altid velkommen til at kontakte os på info@ardustore.dk, eller sende os en besked via messenger (Klik her) og vi vil hjælpe dig.


Anmeldelser
Der er endnu ikke nogle anmeldelser.