Der vil blive pakket ordre den 22/12, 23/12, 29/12, og den 30/12. Vi ønsker alle en god jul, og et godt nytår. :)
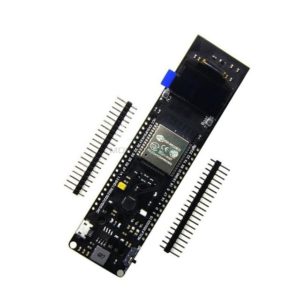
NodeMcu TTGO ESP32 Display WiFi+Bluetooth Udviklingsboard er et board med indbygget ESP32 + Bluetooth. Perfekt til alle IoT projekter.
| Hardware Specifications | |
| Chipset | ESPRESSIF-ESP32 240MHz Xtensa® single-/dual-core 32-bit LX6 microprocessor |
| FLASH | QSPI flash 16MB |
| SRAM | 520 kB SRAM |
| Button | Reset |
| USB to TTL | CP2104 |
| Modular interface | UART、SPI、SDIO、I2C、LED PWM、TV PWM、I2S、IRGPIO、ADC、capacitor touch sensor、DACLNA pre-amplifier |
| Display | IPS ST7789V 1.14 Inch |
| Working voltage | 2.7V-4.2V |
| Working current | About 60MA |
| Sleep current | About 120uA |
| Working temperature range | -40℃ ~ +85℃ |
| Size&Weight | 51.52*25.04*8.54mm(7.81g) |
| Power Supply Specifications | |
| Power Supply | USB 5V/1A |
| Charging current | 500mA |
| Battery | 3.7V lithium battery |
| JST Connector | 2Pin 1.25mm |
| USB | Type-C |
|
Wi-Fi |
|
| Standard | FCC/CE-RED/IC/TELEC/KCC/SRRC/NCC |
| Protocol | 802.11 b/g/n(802.11n,speed up to150Mbps)A-MPDU and A-MSDU polymerization,support 0.4μS Protection interval |
| Frequency range | 2.4GHz~2.5GHz(2400M~2483.5M) |
| Transmit Power | 22dBm |
| Communication distance | 300m |
|
Bluetooth |
|
| Protocol | Meet bluetooth v4.2BR/EDR and BLE standard |
| Radio frequency | With -97dBm sensitivity NZIF receiver Class-1,Class-2&Class-3 emitter AFH |
| Audio frequency | CVSD&SBC audio frequency |
|
Software specification |
|
| Wi-Fi Mode | Station/SoftAP/SoftAP+Station/P2P |
| Security mechanism | WPA/WPA2/WPA2-Enterprise/WPS |
| Encryption Type | AES/RSA/ECC/SHA |
| Firmware upgrade | UART download/OTA(Through network/host to download and write firmware) |
| Software Development | Support cloud server development /SDK for user firmware development |
| Networking protocol | IPv4、IPv6、SSL、TCP/UDP/HTTP/FTP/MQTT |
| User Configuration | AT + Instruction set, cloud server, android/iOSapp |
| OS | FreeRTOS |
Før du kan starte din programmering skal Arduino’s IDE software hentes. Dette program bruges til at programmere chippen.
Download fra dette link: Downlaod
Inden programmeringen kan udfæres skal den rigtige “COM” port findes. Klik “Værktøj/Port” – og vælg COM port.
På nogle computer skal der ikke bruges en driver da Windows selv finder ud af det. men med en CP2104 USB chip skal computer i nogle tilfælde have en driver den kan downloades her.
Her viser vi et hurtig eksempel på hvordan du får vist et digitalt ur på displayet.
/*
An example digital clock using a TFT LCD screen to show the time.
Demonstrates use of the font printing routines. (Time updates but date does not.)

For a more accurate clock, it would be better to use the RTClib library.
But this is just a demo.

This examples uses the hardware SPI only. Non-hardware SPI
is just too slow (~8 times slower!)

Based on clock sketch by Gilchrist 6/2/2014 1.0
Updated by Bodmer
A few colour codes:

code color
0x0000 Black
0xFFFF White
0xBDF7 Light Gray
0x7BEF Dark Gray
0xF800 Red
0xFFE0 Yellow
0xFBE0 Orange
0x79E0 Brown
0x7E0 Green
0x7FF Cyan
0x1F Blue
0xF81F Pink

*/

#include <TFT_eSPI.h> // Graphics and font library for ST7735 driver chip
#include <SPI.h>

TFT_eSPI tft = TFT_eSPI(); // Invoke library, pins defined in User_Setup.h

uint32_t targetTime = 0; // for next 1 second timeout

byte omm = 99;
boolean initial = 1;
byte xcolon = 0;
unsigned int colour = 0;

static uint8_t conv2d(const char* p) {
uint8_t v = 0;
if ('0' <= *p && *p <= '9')
v = *p - '0';
return 10 * v + *++p - '0';
}

uint8_t hh=conv2d(__TIME__), mm=conv2d(__TIME__+3), ss=conv2d(__TIME__+6); // Get H, M, S from compile time

void setup(void) {
tft.init();
tft.setRotation(1);
tft.fillScreen(TFT_BLACK);

tft.setTextColor(TFT_YELLOW, TFT_BLACK); // Note: the new fonts do not draw the background colour

targetTime = millis() + 1000;
}

void loop() {
if (targetTime < millis()) {
targetTime = millis()+1000;
ss++; // Advance second
if (ss==60) {
ss=0;
omm = mm;
mm++; // Advance minute
if(mm>59) {
mm=0;
hh++; // Advance hour
if (hh>23) {
hh=0;
}
}
}

if (ss==0 || initial) {
initial = 0;
tft.setTextColor(TFT_GREEN, TFT_BLACK);
tft.setCursor (8, 52);
tft.print(__DATE__); // This uses the standard ADAFruit small font

tft.setTextColor(TFT_BLUE, TFT_BLACK);
tft.drawCentreString("It is windy",120,48,2); // Next size up font 2

//tft.setTextColor(0xF81F, TFT_BLACK); // Pink
//tft.drawCentreString("12.34",80,100,6); // Large font 6 only contains characters [space] 0 1 2 3 4 5 6 7 8 9 . : a p m
}

// Update digital time
byte xpos = 6;
byte ypos = 0;
if (omm != mm) { // Only redraw every minute to minimise flicker
// Uncomment ONE of the next 2 lines, using the ghost image demonstrates text overlay as time is drawn over it
tft.setTextColor(0x39C4, TFT_BLACK); // Leave a 7 segment ghost image, comment out next line!
//tft.setTextColor(TFT_BLACK, TFT_BLACK); // Set font colour to black to wipe image
// Font 7 is to show a pseudo 7 segment display.
// Font 7 only contains characters [space] 0 1 2 3 4 5 6 7 8 9 0 : .
tft.drawString("88:88",xpos,ypos,7); // Overwrite the text to clear it
tft.setTextColor(0xFBE0, TFT_BLACK); // Orange
omm = mm;

if (hh<10) xpos+= tft.drawChar('0',xpos,ypos,7);
xpos+= tft.drawNumber(hh,xpos,ypos,7);
xcolon=xpos;
xpos+= tft.drawChar(':',xpos,ypos,7);
if (mm<10) xpos+= tft.drawChar('0',xpos,ypos,7);
tft.drawNumber(mm,xpos,ypos,7);
}

if (ss%2) { // Flash the colon
tft.setTextColor(0x39C4, TFT_BLACK);
xpos+= tft.drawChar(':',xcolon,ypos,7);
tft.setTextColor(0xFBE0, TFT_BLACK);
}
else {
tft.drawChar(':',xcolon,ypos,7);
colour = random(0xFFFF);
// Erase the old text with a rectangle, the disadvantage of this method is increased display flicker
tft.fillRect (0, 64, 160, 20, TFT_BLACK);
tft.setTextColor(colour);
tft.drawRightString("Colour",75,64,4); // Right justified string drawing to x position 75
String scolour = String(colour,HEX);
scolour.toUpperCase();
char buffer[20];
scolour.toCharArray(buffer,20);
tft.drawString(buffer,82,64,4);
}
}
}
Du er altid velkommen til at kontakte os på info@ardustore.dk, eller sende os en besked via messenger (Klik her) og vi vil hjælpe dig.
På lager
Tilføj til kurv
På lager
Tilføj til kurv
På lager
Tilføj til kurv
På lager
Tilføj til kurv
På lager
Tilføj til kurv
På lager
Tilføj til kurv
På lager
Tilføj til kurv
På lager
Tilføj til kurvTelefonen har åben:
Mandag – Fredag 07.00 – 16.00
Kontakt os:
Mail: info@ardustore.dk
Telefon: 41403333
Virksomheden:
Ardustore.dk
Klinkbjerg 4B
6200 Åbenrå
CVR: 39973804
Afhentning: Ordren som afhentes bliver lagt i postkassen som er låst med en kode. Koden kommer i den mail som sendes når pakken kan afhentes. Vores postkasse er på væggen i gården.
Vi er meget mere ind bare en webshop, vi tilbyder også forskellige service.
– Udvikling af egen PCB print
– Salg af komplet styringer
– Software udvikling
– Programmering
– 3D Design af kasser
Skriv til os på info@ardustore.dk
Vi vil prøve noget nyt! Der findes ingen sider i Danmark som tilbyder forums inde for Arduino! Derfor har vi prøvet at lave et lille univers for Arduino entusiaster.


Telefonen har åben:
Mandag – Fredag 07.00 – 16.00
Kontakt os:
Mail: info@ardustore.dk
Telefon: 41403333
Virksomheden:
Ardustore.dk
Klinkbjerg 4B
6200 Åbenrå
CVR: 39973804
Webshoppen er ikke en butik som kan besøges. Men det er muligt at afhente ordre, dog efter aftale via mail eller tlf. (Også i weekenden)
Afhentning: Ordren som afhentes bliver lagt i postkassen som er låst med en kode. Koden kommer i den mail som sendes når pakken kan afhentes.
Vi er meget mere ind bare en webshop, vi tilbyder også forskellige service.
– Udvikling af egen PCB print
– Salg af komplet styringer
– Software udvikling
– Programmering
– 3D Design af kasser
Skriv til os på info@ardustore.dk
Vi vil prøve noget nyt! Der findes ingen sider i Danmark som tilbyder forums inde for Arduino! Derfor har vi prøvet at lave et lille univers for Arduino entusiaster.


Anmeldelser
Der er endnu ikke nogle anmeldelser.