


USR-ES1 W5500 Ethernet Module.
Power supply mode: 3.3V external power supply, current should be more than 200mA;
Control interface:The TTL level, 3.3V SPI interface;
PCB size:23 * 25 mm;
Mechanical Dimensions:28.5 * 23 * 24;
USR-ES1 is the Ethernet module of a SPI interface, interface is TTL level of 3.3V, power supply voltage of +3.3V, please ensure that the current is not less than 200mA, voltage is continuous and stable +3.3V.
Før du kan starte din programmering skal Arduino’s IDE software hentes. Dette program bruges til at programmere chippen.
Download fra dette link: Downlaod
Inden programmeringen kan udfæres skal den rigtige “COM” port findes. Klik “Værktøj/Port” – og vælg COM port.
På nogle computer skal der ikke bruges en driver da Windows selv finder ud af det. men med en CP2104 USB chip skal computer i nogle tilfælde have en driver den kan downloades her.
Vigtigt: Inden koden kan uploades skal modulet være i “Programmering Mode”. Når du har trykket “Upload” i arduino IDE og testen “Connecting” vises skal “BOOT” knappen på boardet trykkes ned i 3 sekunder, derefter uploades koden. (Ca 5 sekunder efter “Upload” er tryket i arduino IDE)
Her viser vi et hurtig eksempel på hvordan du kan få dette ESP32 udviklingsboard på wifi via kabel. Det vil altid være bedre at forsyne modulet med sin egen strøm forsyning, så den kan trække noget strøm.
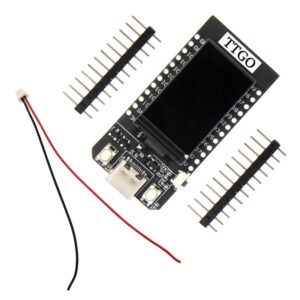
Du skal bruge:
Du skal samle det hele sådan:
| ESP32 | w5500 |
|---|---|
| D5 | CS |
| D18 | SCK |
| D19 | MISO (MI) |
| D23 | MOSI (MO) |
| 3.3v (better with external 200mha) | VCC (V) |
| GND | GND (G) |
Hent denne library i arduino IDE.

Hent denne library i arduino IDE.

Hvis du bruger Arduino Ethernet-biblioteket, skal du ændre biblioteket, så det understøtter de store bufferstørrelser, der kræves af SSL. Derfor skal “Ethernet.h” ændres i koden.
Filen findes her: (Filen kan åbnes med Word)
Filen kan være skrivebeskyttet så du skal tillade at ændre i filen.
Original kode:
// Configure the maximum number of sockets to support. W5100 chips can have
// up to 4 sockets. W5200 & W5500 can have up to 8 sockets. Several bytes
// of RAM are used for each socket. Reducing the maximum can save RAM, but
// you are limited to fewer simultaneous connections.
#if defined(RAMEND) && defined(RAMSTART) && ((RAMEND - RAMSTART) <= 2048)
#define MAX_SOCK_NUM 4
#else
#define MAX_SOCK_NUM 8
#endif

// By default, each socket uses 2K buffers inside the Wiznet chip. If
// MAX_SOCK_NUM is set to fewer than the chip's maximum, uncommenting
// this will use larger buffers within the Wiznet chip. Large buffers
// can really help with UDP protocols like Artnet. In theory larger
// buffers should allow faster TCP over high-latency links, but this
// does not always seem to work in practice (maybe Wiznet bugs?)
//#define ETHERNET_LARGE_BUFFERS
Modification kode:
// Configure the maximum number of sockets to support. W5100 chips can have
// up to 4 sockets. W5200 & W5500 can have up to 8 sockets. Several bytes
// of RAM are used for each socket. Reducing the maximum can save RAM, but
// you are limited to fewer simultaneous connections.
#define MAX_SOCK_NUM 2

// By default, each socket uses 2K buffers inside the Wiznet chip. If
// MAX_SOCK_NUM is set to fewer than the chip's maximum, uncommenting
// this will use larger buffers within the Wiznet chip. Large buffers
// can really help with UDP protocols like Artnet. In theory larger
// buffers should allow faster TCP over high-latency links, but this
// does not always seem to work in practice (maybe Wiznet bugs?)
#define ETHERNET_LARGE_BUFFERS
#include <WebServer_ESP32_W5500.h>
#include <WebServer_ESP32_W5500.hpp>


#include <SPI.h>
#include <Ethernet.h>

// if you don't want to use DNS (and reduce your sketch size)
// use the numeric IP instead of the name for the server:
//IPAddress server(74,125,232,128); // numeric IP for Google (no DNS)
//char server[] = "www.google.com"; // name address for Google (using DNS)
char server[] = "httpbin.org"; // name address for Google (using DNS)

// Enter a MAC address for your controller below.
// Newer Ethernet shields have a MAC address printed on a sticker on the shield
byte mac[] = { 0xDE, 0xAD, 0xBE, 0xEF, 0xFE, 0xED };

// Set the static IP address to use if the DHCP fails to assign
#define MYIPADDR 192,168,1,28
#define MYIPMASK 255,255,255,0
#define MYDNS 192,168,1,1
#define MYGW 192,168,1,1

// Initialize the Ethernet client library
// with the IP address and port of the server
// that you want to connect to (port 80 is default for HTTP):
EthernetClient client;

// Variables to measure the speed
unsigned long beginMicros, endMicros;
unsigned long byteCount = 0;
bool printWebData = true; // set to false for better speed measurement

void setup() {
Serial.begin(115200);
delay(1000);
Serial.println("Begin Ethernet");

// You can use Ethernet.init(pin) to configure the CS pin
//Ethernet.init(10); // Most Arduino shields
Ethernet.init(5); // MKR ETH Shield
//Ethernet.init(0); // Teensy 2.0
//Ethernet.init(20); // Teensy++ 2.0
//Ethernet.init(15); // ESP8266 with Adafruit FeatherWing Ethernet
//Ethernet.init(33); // ESP32 with Adafruit FeatherWing Ethernet

if (Ethernet.begin(mac)) { // Dynamic IP setup
Serial.println("DHCP OK!");
}else{
Serial.println("Failed to configure Ethernet using DHCP");
// Check for Ethernet hardware present
if (Ethernet.hardwareStatus() == EthernetNoHardware) {
Serial.println("Ethernet shield was not found. Sorry, can't run without hardware. :(");
while (true) {
delay(1); // do nothing, no point running without Ethernet hardware
}
}
if (Ethernet.linkStatus() == LinkOFF) {
Serial.println("Ethernet cable is not connected.");
}

IPAddress ip(MYIPADDR);
IPAddress dns(MYDNS);
IPAddress gw(MYGW);
IPAddress sn(MYIPMASK);
Ethernet.begin(mac, ip, dns, gw, sn);
Serial.println("STATIC OK!");
}
delay(5000);


Serial.print("Local IP : ");
Serial.println(Ethernet.localIP());
Serial.print("Subnet Mask : ");
Serial.println(Ethernet.subnetMask());
Serial.print("Gateway IP : ");
Serial.println(Ethernet.gatewayIP());
Serial.print("DNS Server : ");
Serial.println(Ethernet.dnsServerIP());

Serial.println("Ethernet Successfully Initialized");
// if you get a connection, report back via serial:
if (client.connect(server, 80)) {
Serial.println("Connected!");
// Make a HTTP request:
client.println("GET /get HTTP/1.1");
client.println("Host: httpbin.org");
client.println("Connection: close");
client.println();
} else {
// if you didn't get a connection to the server:
Serial.println("connection failed");
}
beginMicros = micros();
}

void loop() {

// if there are incoming bytes available
// from the server, read them and print them:
int len = client.available();
if (len > 0) {
byte buffer[80];
if (len > 80) len = 80;
client.read(buffer, len);
if (printWebData) {
Serial.write(buffer, len); // show in the serial monitor (slows some boards)
}
byteCount = byteCount + len;
}

// if the server's disconnected, stop the client:
if (!client.connected()) {
endMicros = micros();
Serial.println();
Serial.println("disconnecting.");
client.stop();
Serial.print("Received ");
Serial.print(byteCount);
Serial.print(" bytes in ");
float seconds = (float)(endMicros - beginMicros) / 1000000.0;
Serial.print(seconds, 4);
float rate = (float)byteCount / seconds / 1000.0;
Serial.print(", rate = ");
Serial.print(rate);
Serial.print(" kbytes/second");
Serial.println();

// do nothing forevermore:
while (true) {
delay(1);
}
}
}
Du er altid velkommen til at kontakte os på info@ardustore.dk, eller sende os en besked via messenger (Klik her) og vi vil hjælpe dig.
På lager (2)
Tilføj til kurv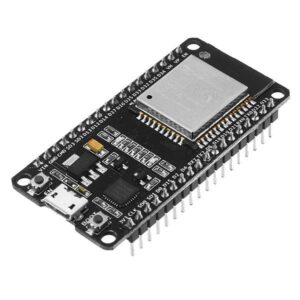
På lager (40)
Tilføj til kurv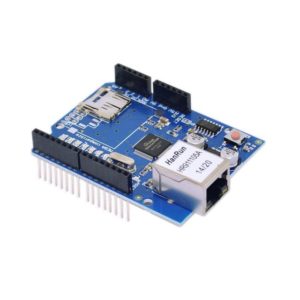
På lager (20)
Tilføj til kurv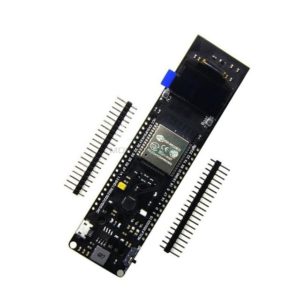
På lager (2)
Tilføj til kurv
På lager (78)
Tilføj til kurv
På lager (79)
Tilføj til kurv
På lager (112)
Tilføj til kurv
På lager (64)
Tilføj til kurv
Anmeldelser
Der er endnu ikke nogle anmeldelser.